Flymon User Manual - Click cover image for video tutorial
⚠️ Important Notice
- Play using Cellular Data
👉 On iOS 26 and above, using Wi-Fi may interfere with GPS positioning and cause your location to reset to your real location. It is strongly recommended to use a 4G/5G mobile network while playing.
If you need to move or teleport beyond the 17 km system limit, please use the MEGACOM Firewall. You must also follow the cooldown rules.

MEGACOM Firewall Tutorial:
https://flymonpro.com/tutorial-center/megacom-firewall
- Avoid Environments with Overly Strong GPS Signals
👉 It is recommended to use the device indoors or in partially sheltered spaces, and avoid open areas like roofs or the center of parks.
👉 For optimal results, use alongside MEGACOM Firewall to further minimize real-world location interference.
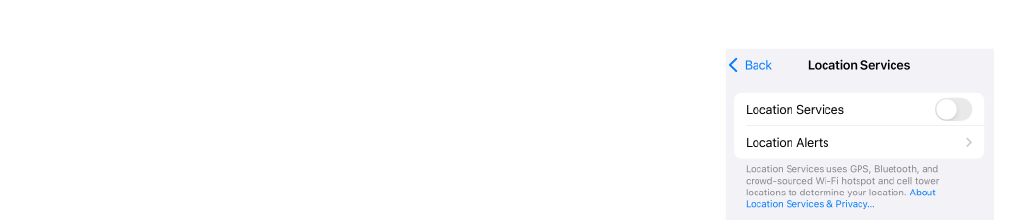
- iOS Location Settings
👉 Systems updated to iOS 26.0.1, turn off specific options to make location spoofing / movement within 15km much more stable!
*If you encounter issues where the location cannot move, teleport, or the phone location cannot be found, you can repeat this step here: turn off Location Services for 5 seconds and then turn it back on.
1.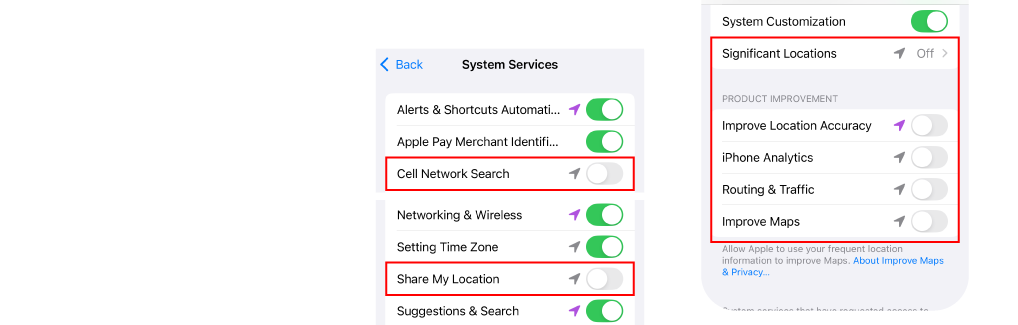
Settings > Privacy & Security > Location Services > System Services
Share My Location > Turn Off
Cellular Network Search > Turn Off
Significant Locations > Turn Off
Improve Location Accuracy > Turn Off
Routing & Traffic > Turn Off
iPhone Analytics > Turn Off
Improve Maps > Turn Off
2.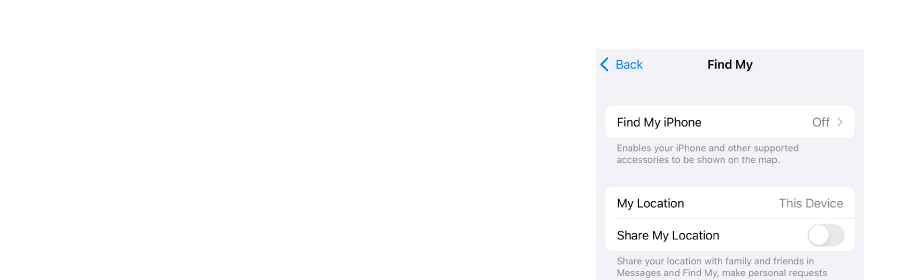
Settings > Privacy & Security > Location Services > Share My Location
Share My Location > Turn Off
3.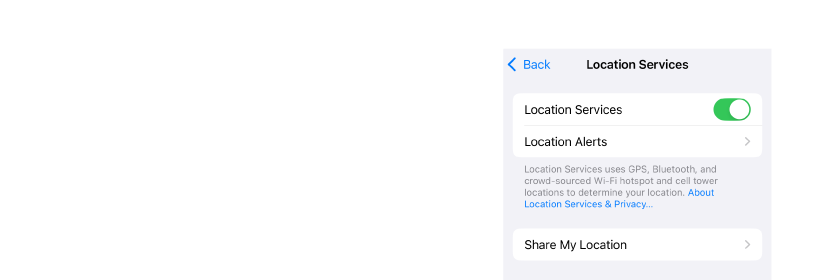
Settings > Privacy & Security > Location Services
Location Services > Turn Off > Wait for 5 seconds > Turn On
Flymon Connection Guide
1 Turn on the Flymon device by switching the power to ON.
2 On your iPhone, go to Settings > Bluetooth, search for "FLYMON-XX", and tap to pair.
3 Open the Flymon Center app and press the joystick to automatically search and connect.
4 After pairing, the app will automatically check the firmware version. If a new version is available, we recommend updating.
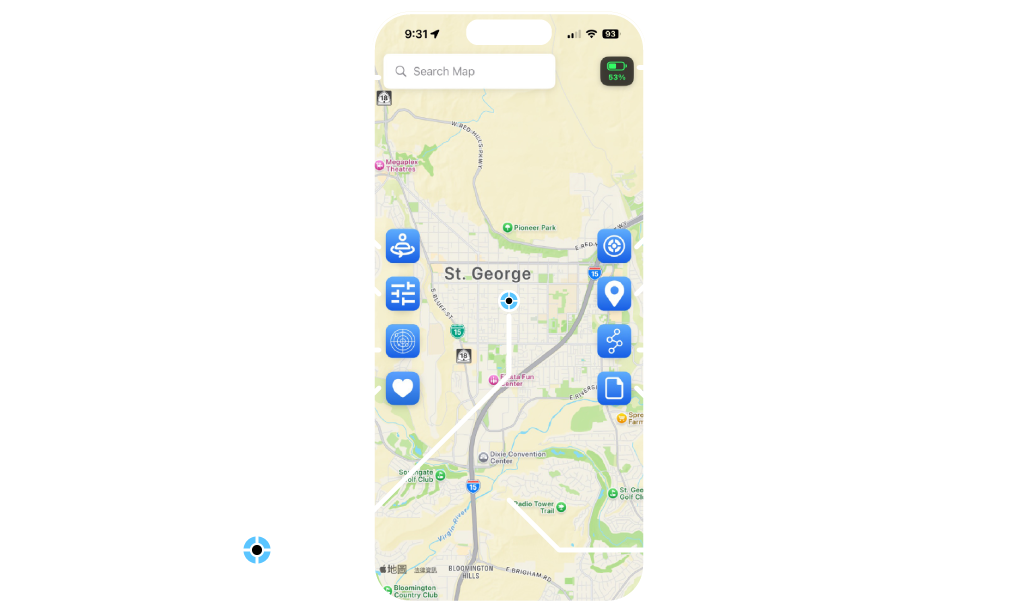
Flymon Center App Interface
-
Left Panel: Location Search Bar, Auto Circling, Settings, Movement Range
-
Right Panel: Auto Catch, Return to Location, Route, Favorites
-
Center: Current Location, Map
Basic Operations
-
Real Location: Refers to the device's real GPS position. Without using the MEGACOM Firewall, iOS restricts virtual movement to within a 17 km radius of the real location.

-
Current Location: After opening the Flymon Center app, the center of the map displays Flymon's current virtual location. By default, it matches your phone's real location.
Users can freely change Flymon's virtual location. If the map has been moved too far and the current location is no longer visible, tap “Return to Location” to re-center the map on Flymon's current virtual location.

How to Move Flymon's Virtual Location
-
Physical Joystick: Use the joystick on the Flymon device to move your virtual location, allowing your character to move freely in the game.

-
Location Search: Search for a location or enter map coordinates. A location window will appear, where you can choose to auto move or teleport instantly.

-
Long Press on Map: Move the map to your desired destination, then long press on the target location. A location window will appear, allowing you to auto move or teleport instantly.

Location Window
After long pressing on the map or selecting a location, a location window will appear. It displays location details and provides options for movement and saving locations.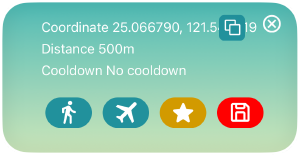
-
Coordinates: Displays the latitude and longitude of the selected location, with an option to copy.

-
Distance: Shows the distance between the selected location and your current virtual location. This distance corresponds to the recommended cooldown time after movement.

-
Cooldown: If actions such as catching or spinning are performed and you move to another location too quickly, the system may detect this as abnormal behavior.
It is recommended to wait for the cooldown time after moving before continuing gameplay. Please refer to the following sections for details.
-
Go (Auto Move): Simulates natural movement such as walking or cycling. Movement speed can be adjusted in Settings.

-
Teleport: Instantly move to the selected location.

-
Memory Slots: Save locations directly to the Flymon device.There are 3 available slots, allowing you to store or overwrite locations for quick access using the physical device. Please refer to the following sections for details.

-
Save to Favorites: Save multiple locations to your Favorites list for quick access.

Auto Circling

After enabling this feature, Flymon uses your current virtual location as the center point, moves to the maximum set radius, and begins circling counterclockwise from the outer edge inward.
Once it returns to the starting point, the movement will repeat automatically. Tap Auto Circling again to stop immediately.
Go to Settings to adjust the circling radius and movement speed.
Route Feature
By adding waypoints, you can create a route across multiple locations. The route starts from your current virtual location and can be set to repeat in a loop.
For detailed instructions, please refer to the tutorial video: https://youtu.be/zoG0FaWGp2I
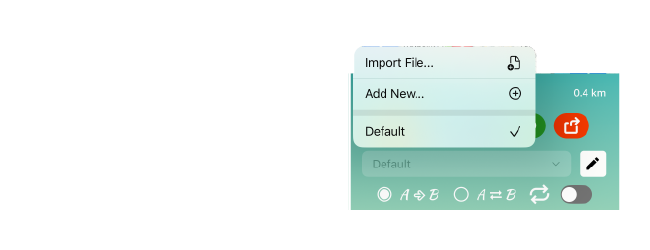
Options
-
Default: A blank default route. This route cannot be renamed. To create a custom route, please add a new one.

-
Add Route: Create a new blank route.

-
Add Waypoint: Long press on the map to add a location point.

-
Sort: Long press the sort icon and drag waypoints to adjust the route order. Changes are saved automatically.

-
Rename: Edit the names of routes and waypoints.

Navigation
-
Start / Pause: Start or pause movement along the planned route.

-
Cancel Route Navigation: Stop the current route navigation.

-
Delete Route: Delete the selected route.

Movement Modes

-
One-way: 1 → 2 → 3 → 1
Follows the route in sequence and returns to the starting point. -
Back-and-Forth: 1 → 2 → 3 → 2 → 1
Moves forward and then returns in reverse order.
-
Loop: When enabled, the route will repeat continuously.
Share / Import GPX Files
Routes can be exported as GPX files for sharing with others. You can also import GPX files created by other users.
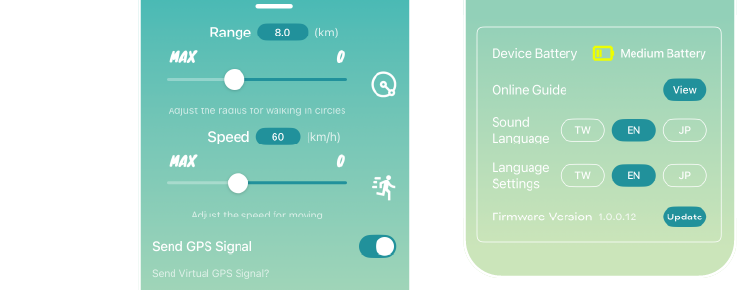
Settings
-
Range: Adjust the auto circling radius.

-
Speed: Adjust movement speed for joystick control, navigation, routes, and auto circling.

- Send GPS Signal: When connected via Bluetooth, Flymon enables virtual GPS and overrides your phone's real location.

If you need to use navigation or delivery apps, disable this function to restore your real GPS without closing the Flymon Center app.
Then go to your phone settings, turn off Location Services for about 3 seconds, and turn it back on to reset.
-
Device Battery: Displays the current battery level (High / Medium / Low).
-
Online Guide: Links to the official tutorial center.
-
Voice Language: Select voice language: Chinese / English / Japanese.
-
Interface Language: Select interface language: Chinese / English / Japanese.
-
Firmware Version: Displays the current firmware version and allows you to check for updates.
Auto Catch (Flymon App)
Statistics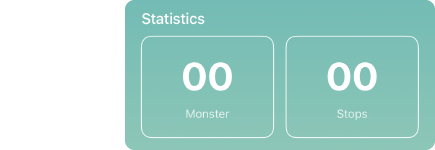
-
Pokémon Caught: Total number of successful auto catches.
-
PokéStops Spun: Total number of successful spins.
⚙️ Function Settings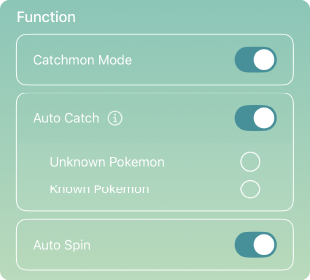
-
Catch Mode: Automatically detects and catches nearby Pokémon.After movement, it is recommended to temporarily disable this feature during the cooldown period.
Before teleporting, make sure to turn off this function and follow the cooldown rules. After the cooldown period ends, turn it back on to avoid detection from auto catching or spinning -
Auto Catch: Choose whether to catch unknown Pokémon and/or already registered Pokémon.
-
Auto Spin: Automatically spins nearby PokéStops. After movement, it is recommended to temporarily disable this feature during the cooldown period.
🔊 Audio Settings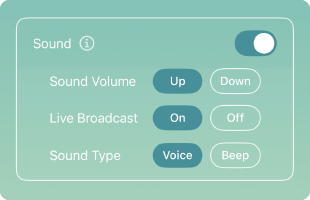
-
Sound Switch: Turn all sounds on or off.
-
Volume: Adjust the sound level (High / Low).
-
Voice Announcements: Provides notifications for captures, inventory status, and device status.
Can be set to On or Mute. -
Sound Type: Select the notification type (Voice / Beep) for captures, inventory, and device alerts.
💡 LED Settings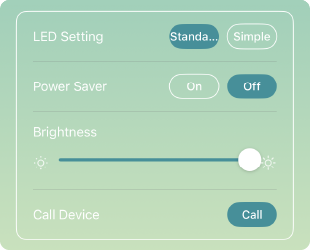
-
LED Settings: Configure the LED indicators below the joystick.Choose between Standard and Simple modes.
Please refer to the LED status table for details. -
Power Saving Mode: Reduces power consumption. After 3 minutes of connection, the LED indicators will automatically turn off.
-
Brightness: Adjust the brightness of the LED indicators.
-
Find Device: When enabled, the device will flash and emit a beep to help locate it.
Requires sound to be enabled.
💡 LED Indicators
LED indicators and their corresponding functions on the Flymon device.

Power / Auto Circling / Bluetooth


Memory Slot Indicators
A solid red light indicates the memory function is active.
Press the Memory button to cycle through the three slots. Press the joystick to instantly teleport to the saved location.
Device Status Report
Press the joystick to announce the device status and display LED indicators. Press again to switch between different status reports. Long press to enter function settings.
LED Status Modes
The LED under the joystick displays real-time Pokémon GO status using color indicators.
You can switch between Standard Mode and Simple Mode in LED Settings under the Auto Catch interface.
- Standard Mode
- Simple Mode